


Is a reluctance to adjust your own bridge resulting in unnecessary trips to the luthier? Paris Andrew from the Women in Lutherie community explains how it’s done
Once upon a time before I began my lutherie journey I was a young violinist – and like most young violinists I both adored and was terrified of my instrument! I was convinced that if I tried to change or adjust or even tune up my violin it would implode in my hands, much to the dismay of my violin teacher who had to change my strings, move the bridge and accept that I hadn’t practised for a week due to a problem I could have solved myself. But as musicians of any level, there are so many small things we can do to protect and improve our instruments that will also save a lot of luthier visits.
So let’s start with the bridge:
The fundamentals and how to adjust:
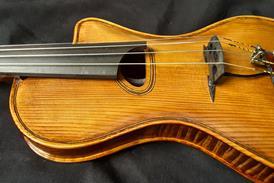
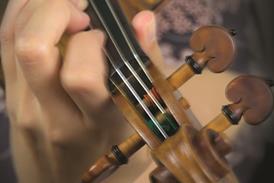
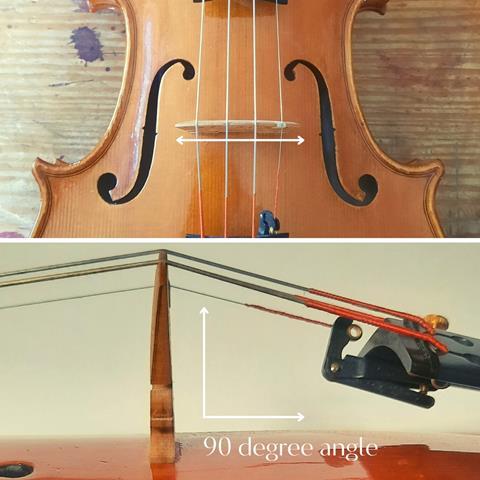
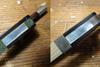
The bridge should be sitting level with the notches in the sound holes and the side facing the tailpiece at a ninety degree angle with the body. Most importantly the strings shouldn’t feel too resistant to pressure, or buzz against the fingerboard. Often the bridge likes to bend when you tune your instrument, so you may need to wiggle it into place; the best way to do this is to sit down and place the instrument on your lap, or for a cello or viol pop it on a table – after loosening the strings a little (not too much or you risk the soundpost falling down) hold the bridge with thumbs and forefingers and gently slide it back into an upright position so the feet are perfectly flush with the body.

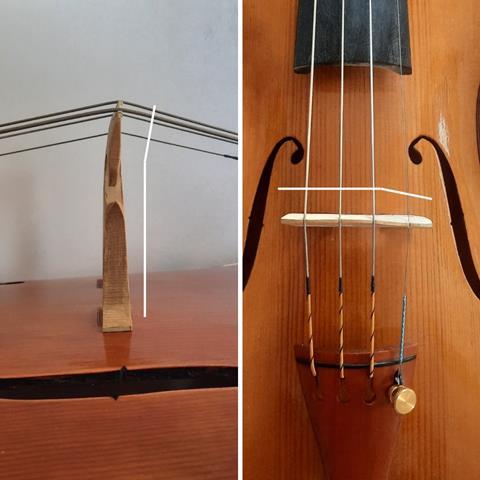
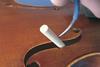
Remember to check that it is also sitting between the soundpost notches and is a nice diagonal line. When you are changing strings, this is a good time to get some graphite on the notches on the bridge to help the strings slide better when tuning, you can do this by rubbing a pencil in the grooves for the strings. For the highest string, there should also be some protection on the bridge – this is sometimes a little piece of card or plastic glued over the groove, a little ebony inlay or simply a mini rubber tube on the string. If you have a rubber tube, make sure that it is sitting on the bridge otherwise it will rattle around and the mysterious buzz will drive you crazy!
When do you need luthier?
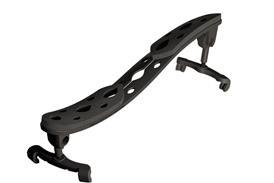
The main problem with bridges is that over time they bend or distort. In this case you will unfortunately need to get a new bridge, so it’s time to find your friendly neighbourhood luthier and talk about options. Another common problem is that the bridge is too high, making it uncomfortable for your hand pressing down on the strings, or it can be too low and the strings will start to vibrate against the fingerboard. This is also a problem for a luthier to have a look at.
It is important to remember that if you’re having a bad time with your bridge and spot a cheap one on Amazon, it is not finished yet so you can’t replace it yourself – a ‘bridge blank’ looks a lot like a normal bridge but it needs to have it’s feet cut to fit the curve of the body, it needs to be thinned down, and then the top needs cutting down to the right height and curvature so the instrument is comfortable to play and it is possible to play the strings individually as well as all at once.
Read: ‘You raise me up’: Women in Lutherie
Listen: The Strad Podcast Episode #37: Paris Andrew from Women in Lutherie
I hate to be the bearer of bad news, but I must also warn against the use of superglue to hold the bridge in place! I’ve had many instruments with all sorts of bridge woes pass through my workshop, and believe me, I’ve seen some horror stories!
At the end of the day, if you are worried or need advice, you can always turn to a professional, but for positioning and basic maintenance you can save a lot of time and money by checking your bridge regularly when tuning and making some adjustments yourself.
Happy playing!
Best of 2022: The Strad’s 12 Days of Lutherie
- 1
- 2
- 3
- 4
- 5
- 6
- 7
- 8
- 9
 Currently reading
Looking after your instrument: the secret to bridge placement
- 10
- 11
- 12
- 13


No comments yet